
[ODOP] 71일차 - Spring security Login
![[ODOP] 71일차 - Spring security Login](/content/images/size/w1200/2023/08/-----2023-08-01----10.29.26-6.png)
💡
최신 버전에서는 아래의 방식과는 조금 다르게 권한설정을 진행한다.
아래의 설명들은 모두 구버전(2.6.7)을 기준으로 설명하고 있다
아래의 설명들은 모두 구버전(2.6.7)을 기준으로 설명하고 있다
Login 진행 흐름
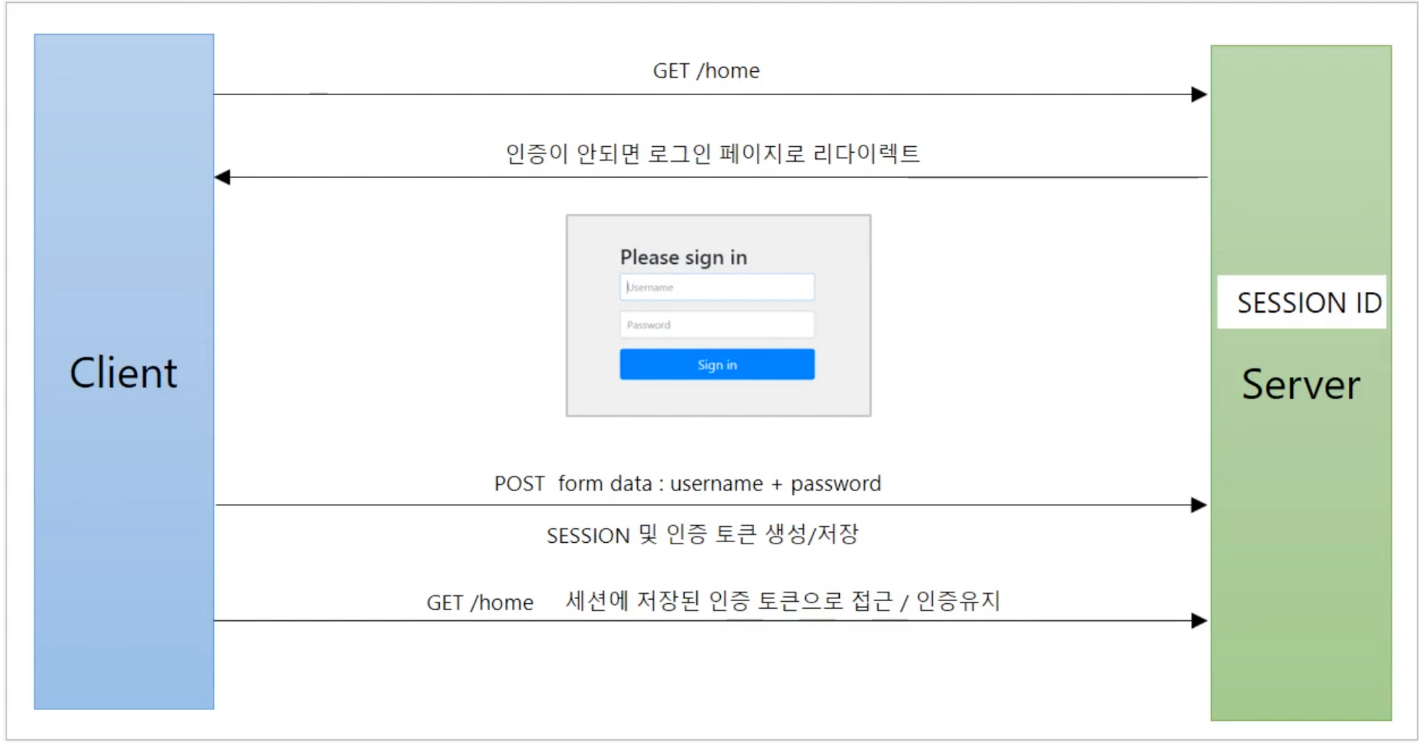
- GET /home
사용자가 GET 방식으로 /home 경로의 서버에 접근을 요청한다 - 인증이 안되면 로그인 페이지로 리다이렉트
최초 로그인 되지 않은 사용자기에 요청되었던 /home 경로의 페이지가 아닌 login 페이지로 리다이렉트 시킨다 - POST form data : username + password
사용자가 로그인 요청을 하고 서버에서는 인증 객체를 생성한다 (instanseof Authentication.class //(Security Context)) - GET /home 세션에 저장된 인증 토큰으로 접근 / 인증유지
다시 클라이언트 쪽에서 /home 페이지로의 접근을 요청한다
인증된 토큰(객체)값이 있으므로 접근 성공
Login 처리 프로세스

UsernamePasswordAuthenticationFilter
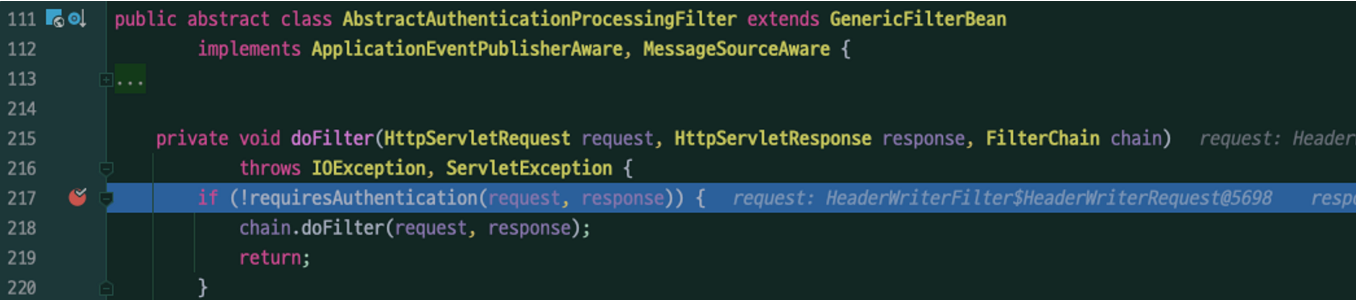
- 부모 객체를 탐색하는 이유는, UsernamePasswordAuthenticationFilter 의 내부에 doFilter 에 대한 구현없이 부모의 구현 내용을 그대로 사용하기 때문이다.
UsernamePasswordAuthenticationFilter 는 여러 클래스들을 이용해 인증 처리를 진행하게 된다
Client 는 최초 이 필터를 거치게 되는데, 여기서 AntPathRequestMatcher 를 호출한다.
AntPathRequestMatcher

AntPathRequestMatcher는 URL 정보가 매칭 되는지 확인한다 (위의 예시에서는 /login )
만약 일치 한다면 인증 로직을 시작하고, 만약 아니라면 chain.doFilter 함수를 이용해 다른 필터로 처리를 위임하게 된다.
이는 사용자 정의 설정이 가능한 항목인데, 이전 포스팅에서 다루었던 HttpSecurity.loginProcessingUrl() 이 바로 그것이다.
Authentication
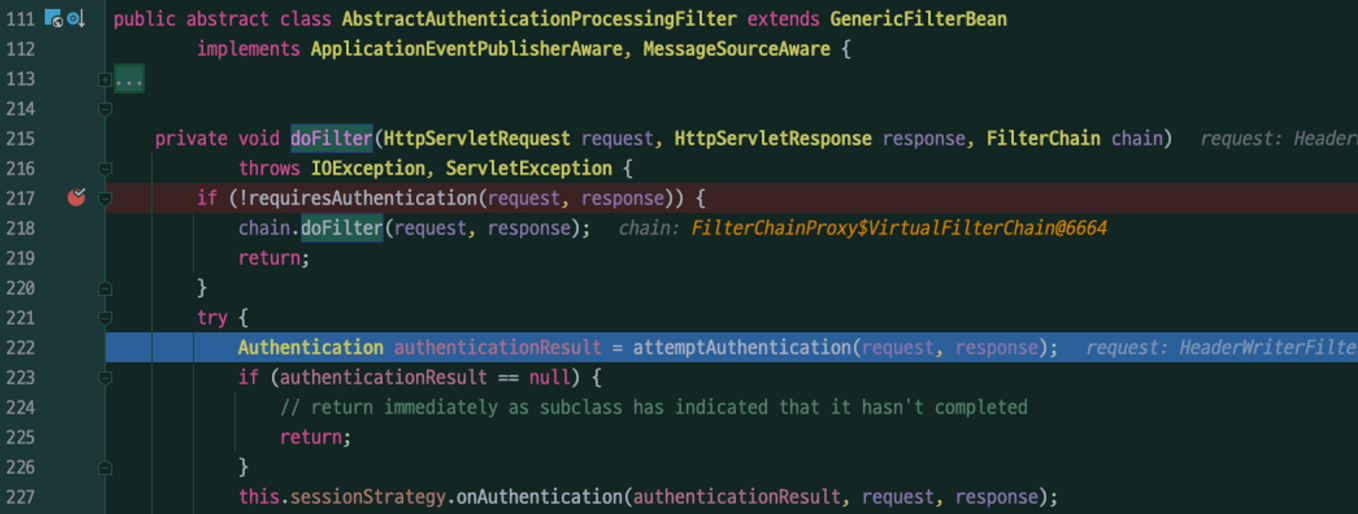
인증 처리를 시작하면 Authentication 객체를 만들게 된다.
이 객체 안에는 사용자가 입력한 Username 과 Password 가 들어가게 된다.
AuthenticationManager

AuthenticationManager 는 이전 로직에서 만들어진 Authentication 객체를 이용해 실제 인증 처리를 위한 클래스들을 보유하고 있다
![[ODOP] 80일차 - CSRF, CsrfFilter](/content/images/size/w960/2023/08/-----2023-08-01----10.29.26-13.png)
![[ODOP] 79 일차 - ExceptionTranslationFilter, RequestCacheAwareFilter](/content/images/size/w960/2023/08/-----2023-08-01----10.29.26-12.png)
![[ODOP] 78일차 - Spring security 권한 설정 및 표현식](/content/images/size/w960/2023/08/-----2023-08-01----10.29.26-11.png)
![[ODOP] 77일차 - SessionManagementFilter, ConcurrentSessionFilter](/content/images/size/w960/2023/08/-----2023-08-01----10.29.26-10.png)