
[F-Lab 모각코 챌린지] 53일차 - Project loom - Virtual thread
F-Lab 모각코 챌린지 53일차 - Project loom 에 대해 공부하며 Virtual thread 를 간단한 예시를 통해 알아보았습니다.
![[F-Lab 모각코 챌린지] 53일차 - Project loom - Virtual thread](/content/images/size/w1200/2023/07/f_lab_mogacko-9-3.png)
Project loom?
Project Loom is to intended to explore, incubate and deliver Java VM features and APIs built on top of them for the purpose of supporting easy-to-use, high-throughput lightweight concurrency and new programming models on the Java platform.
Java 플랫폼에서 사용하기 쉽고 높은 처리량을 가지며 가벼운 동시성 프로그래밍 모델을 지원하기 위해 만들어졌다. Java VM 기능과 API 탐색, 검증 및 제공하는 것을 목표로 한다
웹 문서에 따라 시작을 위해 jdk 19 를 설치한다.
Project loom 은 JDK 19 버전의 Thread api 를 사용 해 가상 스레드를 만드는 데에 익숙해지는 것을 가이드 하고 있다.
Example: Hello Virtual thread
먼저 간단한 가상 스레드를 돌려보자
package com.pollra.project.loom;

public class Main {
    public static void main(String[] args) {
        Thread thread = Thread.ofVirtual().start(() -> System.out.println("Hello"));
        try {
            thread.join();
        } catch (InterruptedException e) {
            throw new RuntimeException(e);
        }
    }
}
문제 발생과 해결
위 코드는 문법적으로 이상이 없으나, 아래의 컴파일타임 에러를 띄운다
/Users/pollra/develop/studies/project_loom_example/src/main/java/com/pollra/project/loom/Main.java:5: error: ofVirtual() is a preview API and is disabled by default.
        Thread thread = Thread.ofVirtual().start(() -> System.out.println("Hello"));
                              ^
  (use --enable-preview to enable preview APIs)
이 에러는 preview 기능이니, 표기 한 인수를 넣어 해결하라는 이야기 이다.
해당 프로젝트는 편의를 위해 gradle 로 작성하였으니 build.gradle 파일에 인수를 추가하여 해결해보자
plugins {
    id 'java'
}

group = 'com.pollra.project.loom'
version = '1.0-SNAPSHOT'

repositories {
    mavenCentral()
}

compileJava {
    options.compilerArgs.add("--enable-preview") // 추가 된 부분
}

dependencies {
    testImplementation platform('org.junit:junit-bom:5.9.1')
    testImplementation 'org.junit.jupiter:junit-jupiter'
}

test {
    useJUnitPlatform()
}
실행 결과
10:26:53 PM: 실행 중 ':Main.main()'...

> Task :compileJava UP-TO-DATE
> Task :processResources NO-SOURCE
> Task :classes UP-TO-DATE
> Task :Main.main() FAILED
2 actionable tasks: 1 executed, 1 up-to-date

FAILURE: Build failed with an exception.

* What went wrong:
Execution failed for task ':Main.main()'.
> Toolchain from `executable` property does not match toolchain from `javaLauncher` property

* Try:
> Run with --stacktrace option to get the stack trace.
> Run with --info or --debug option to get more log output.
> Run with --scan to get full insights.

* Get more help at https://help.gradle.org

BUILD FAILED in 58ms
10:26:53 PM: 실행이 완료되었습니다 ':Main.main()'.
????
excutable 속성과 javaLauncher 의 속성이 일치하지 않는다고 한다
gradle 버전 확인
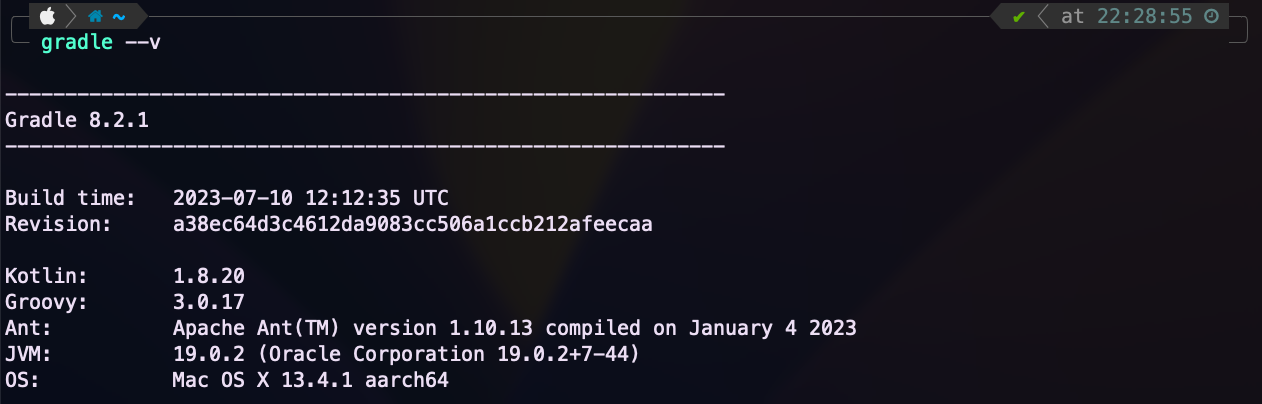
gradle 호환성 확인
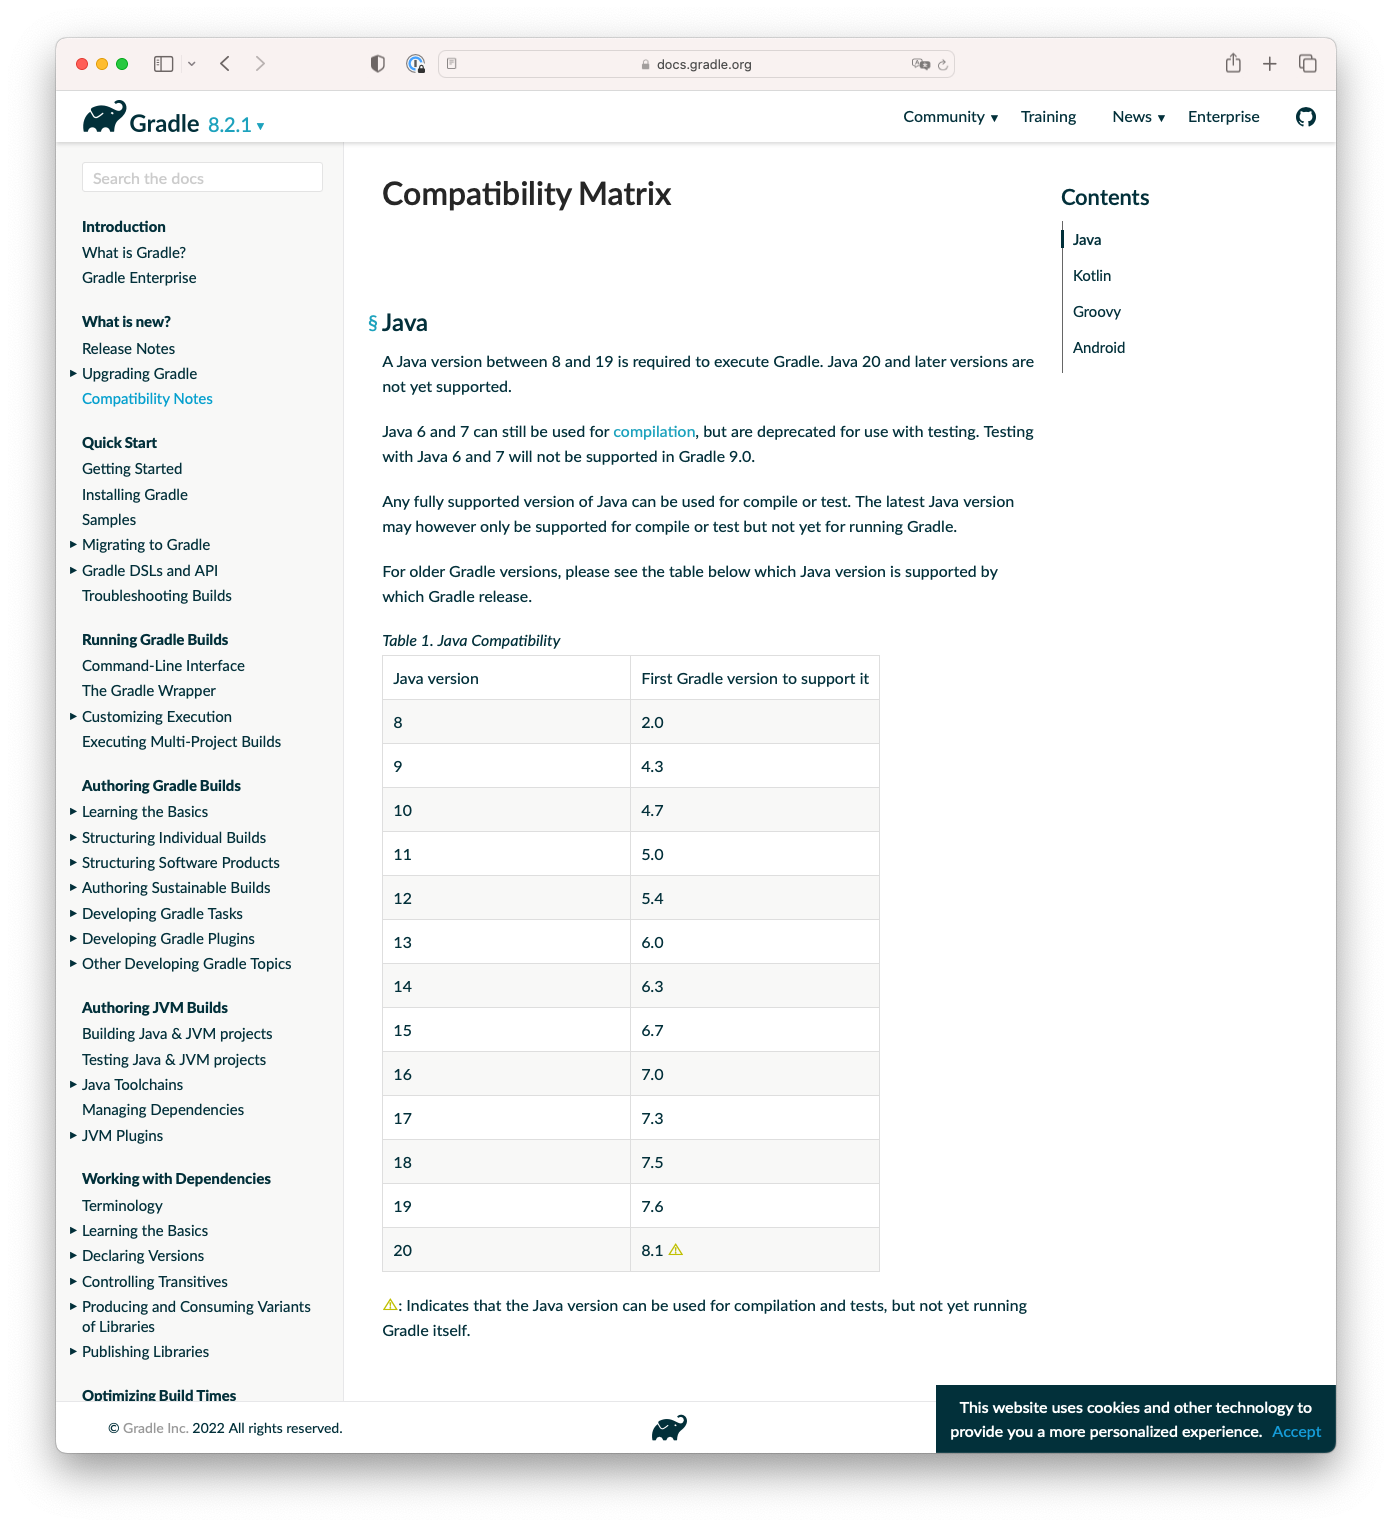
버전을 봤을 때 문제는 없어 보인다
gradle 버전이 너무 높아서 그런가 의심 해 보았지만 결과적으로 해당 문제는 아니였다.
문제되는 것은 IDE 였는데, 아래와 같이 해결하였다
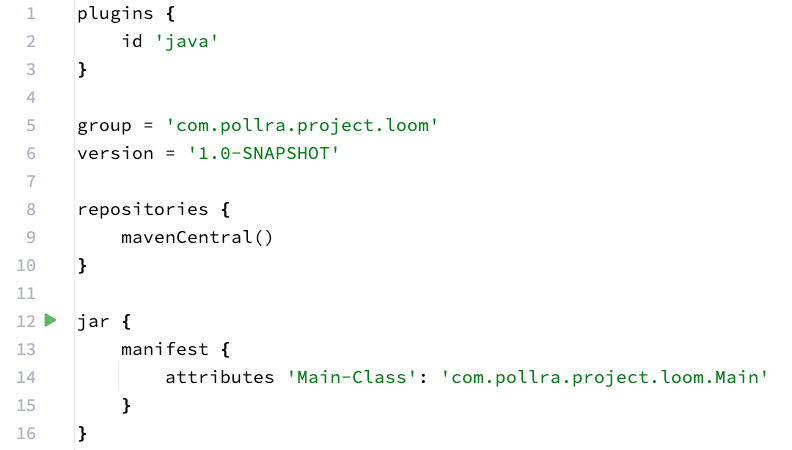
1. build.gradle 에 jar 의 manifest 등록 (진행 과정에서 java 의 menifest 가 설정되어 있지 않다는 오류가 발생하여 추가하였다.)
plugins {
    id 'java'
}

group = 'com.pollra.project.loom'
version = '1.0-SNAPSHOT'

repositories {
    mavenCentral()
}

jar {
    manifest {
        attributes 'Main-Class': 'com.pollra.project.loom.Main'
    }
}

compileJava {
    options.compilerArgs.add("--enable-preview")
}

dependencies {
    testImplementation platform('org.junit:junit-bom:5.9.1')
    testImplementation 'org.junit.jupiter:junit-jupiter'
}

test {
    useJUnitPlatform()
} 2. 프로젝트 루트 경로에서 gradle jar 명령어를 통해 jar 로 패키징

3. 빌드된 jar 파일실행 (실행 시 --enable-preview 옵션을 꼭 넣어주자)
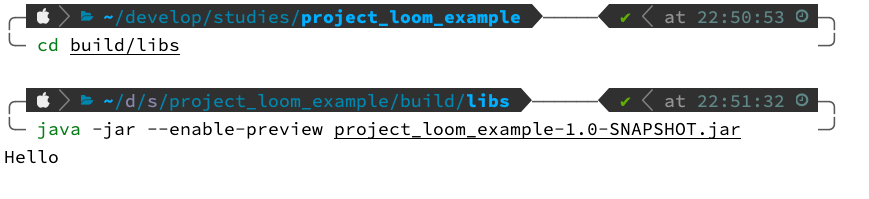
정상적으로 실행되는 모습을 확인 할 수 있다.
Example: Thread.sleep
다음으로 가이드 해주고 있는 예제는 가상 스레드에서 sleep 을 걸고 시작하는 예시이다
위에서 작성 한 첫 번째 예시는 기록해두고 싶어서 클래스를 나누어 작성하였다.
아래의 클래스는 main 함수에서 바로 호출하여 실행한다
import java.time.Duration;
import java.util.concurrent.SynchronousQueue;

public class StepTwo {
    public static void run() { // main 함수에서 StepTwo.run(); 형태로 호출
        var queue = new SynchronousQueue<String>();

        Thread.ofVirtual().start(() -> {
           try {
               Thread.sleep(Duration.ofSeconds(2));
               queue.put("done");
           } catch (InterruptedException e) {}
        });

        try {
            String msg = queue.take();
            System.out.println("msg = " + msg);
        } catch (InterruptedException e) {
            throw new RuntimeException(e);
        }
    }
}
다시 위에서 해결 한 과정을 거쳐 실행
main 스레드가 2초간 대기 했다가 실행하는 모습을 볼 수 있다.
다음 학습 예정 : https://openjdk.org/jeps/428
![[ODOP] 80일차 - CSRF, CsrfFilter](/content/images/size/w960/2023/08/-----2023-08-01----10.29.26-13.png)
![[ODOP] 79 일차 - ExceptionTranslationFilter, RequestCacheAwareFilter](/content/images/size/w960/2023/08/-----2023-08-01----10.29.26-12.png)
![[ODOP] 78일차 - Spring security 권한 설정 및 표현식](/content/images/size/w960/2023/08/-----2023-08-01----10.29.26-11.png)
![[ODOP] 77일차 - SessionManagementFilter, ConcurrentSessionFilter](/content/images/size/w960/2023/08/-----2023-08-01----10.29.26-10.png)